

How to prepare your design files for printing
There’s nothing more frustrating than spending hours on a design project only to find out that the final product isn’t the quality you expected. This could be because of errors in your file preparation, which is why it’s important to take some extra time to prepare your design files for printing. Here are some key steps to ensure your project looks perfect when it hits any press.
Start with CMYK
The colors in your design may look great on your screen, but they won’t translate perfectly to print without adjusting them first. Make sure to switch your design mode to CMYK (Cyan, Magenta, Yellow, Key/Black) to ensure that the colors will accurately match those which are printed. If your design isn’t in CMYK when it’s printed, the end result is likely to be faded or blurry, because RGB (Red, Green, Blue) colors intended for screens are not as vibrant when they’re printed.
Design in the correct size
When you create your design, start by designing it in the size you want it to be printed. You should never resize a small file to make it larger, as this can result in a pixelated final product. Additionally, it’s essential that you give your file a minimum of 300 dpi (dots per inch), and it should be saved in a high-resolution format like .eps, .ai, or print-ready .pdf.
Common sizes
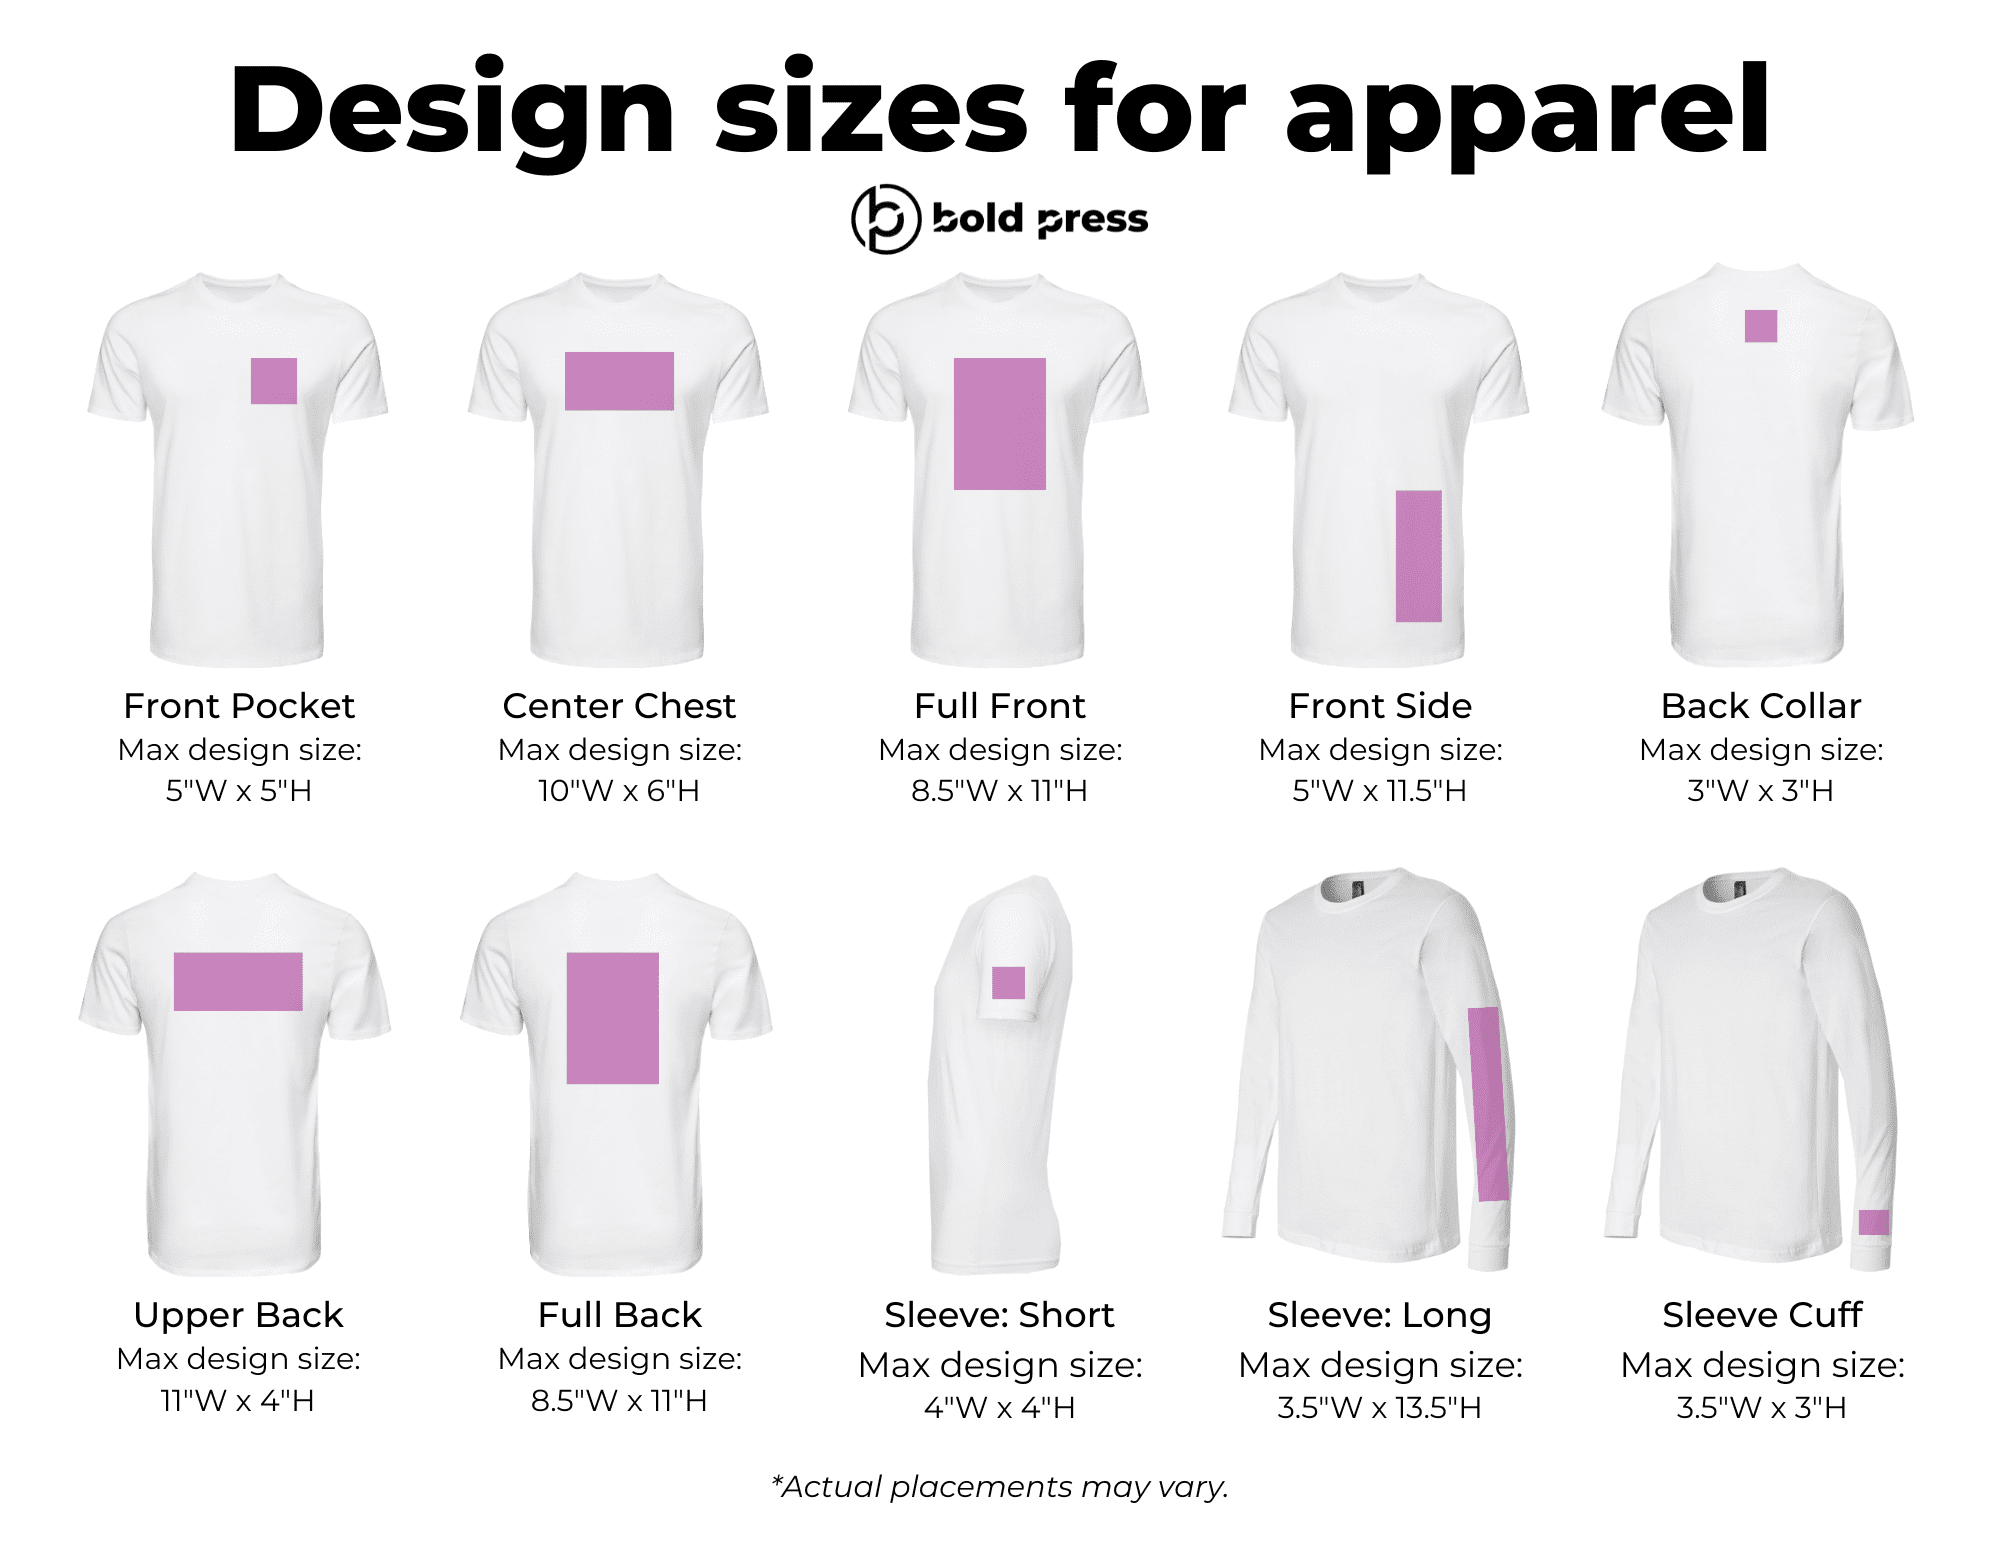
Apparel
There are some common sizes for apparel to consider; here are some guidelines to help you with your design project! Of note: these are the maximum recommendations for your file sizes. If you question it, cut out some paper in the appropriate size below and put it on a shirt!
- Front pocket. We recommend designing your file at the max size, or 5″ wide by 5″ tall. We usually print these at 3.5″ wide by 3.5″ tall, but we like the extra larger sizes just in case. 😉
- Center chest. We recommend 10″ wide by 6″ tall.
- Full front. We recommend 8.5″ wide by 11.5″ tall.
- Front side. We recommend 5″ wide by 11.5″ tall.
- Back collar. We recommend 1″-3″ wide by 1″3″ tall.
- Upper back. We recommend 11″ wide by 4″ tall.
- Full back. We recommend 8.5″ wide by 11.5″ tall.
- Sleeve on a short sleeve. We recommend 3″-4″ wide by 1″-4″ tall.
- Sleeve on a long sleeve. We recommend 3.5″ wide by 13.5″ tall.
- Sleeve cuff. We recommend 3.5″ wide by 3″ tall.
Tumblers
Lucky for you, we have an entire Canva folder of pre-made templates for you to design your files in! If you don’t see a file size you need, message us at highfive@bold.press and we’ll get it added ASAP!
Bleeds and borders
When printing a design on paper, there will always be some slight movement during the printing process, which can cause white borders to appear around the edges. To avoid this, you should include a bleed. This is extra space around the edge of your design that will be trimmed off after printing. If your design doesn’t include a bleed, it could be trimmed off-center, causing a border to appear OR missing information on the sides of your design. A bleed of at least 1/8 inch is recommended.
Print-ready pdf files preferred
Finally, when it’s time to send your design to the printer, your file should be saved as a print-ready PDF. This ensures that the file will look the same on every computer and printer, regardless of the software used to create it. Additionally, PDFs are easily shareable and easy to print, making them the go-to file format for printing. If you are able, it’s highly recommended to create outlines of your fonts prior to PDF creation.
Ready to prepare your design files for printing?
In conclusion, there are a few key steps to ensuring that your design is printed exactly as you intended. Ensure your design is in CMYK, design it in the correct size with a high resolution, incorporate a bleed to avoid white borders, and save your final product as a PDF. Taking these extra steps will increase the chances of a flawless final product, showcasing your design in the best possible light.